In the last tutorial we had a session on Data Modeling.
In this session we have a bit to get through including arranging groups for the upcoming group assessment .We will additionally recap lecture 3 which is on the relational Data Model ,as well as recapping what we did in week 2 tutorial, Data Modeling.
Your tutor will lead you through this and take questions on the previous week. Additionally, we will set aside some time for the formation of the outstanding groups in the tutorial session.
Once the house keeping has been settled, we will look at becoming familiar with PostgreSQLand Dbeaver.
PostgreSQL has already been downloaded and installed on the lab computers for you. Once installed ,PostgreSQLruns as a data base server in the background on the P Call the time,unless you specifically stop the service. But when the computer is restarted, the PostgreSQL service will start again. We can interact directly with the PostgreSQL Server by directly running one of interfacing programs that comes along with it, but we will not do that today. Instead we will interface with the PostgreSQL server through a Database Management tool, Dbeaver.
If you want to install PostgreSQL on your own computer, you can look at the following online tutorial to do this https://www.postgresqltutorial.com/install-postgresql/
To Initiate D Beaver, look for the D Beaver icon on the desktop (or search for D Beaver in the Windows application list). The D Beaver icon looks like the following
 |
Double click the icon to load the D Beaver community edition (which is the free edition ).This can take some time to load while it initializes.
You should see the following screen when it loads
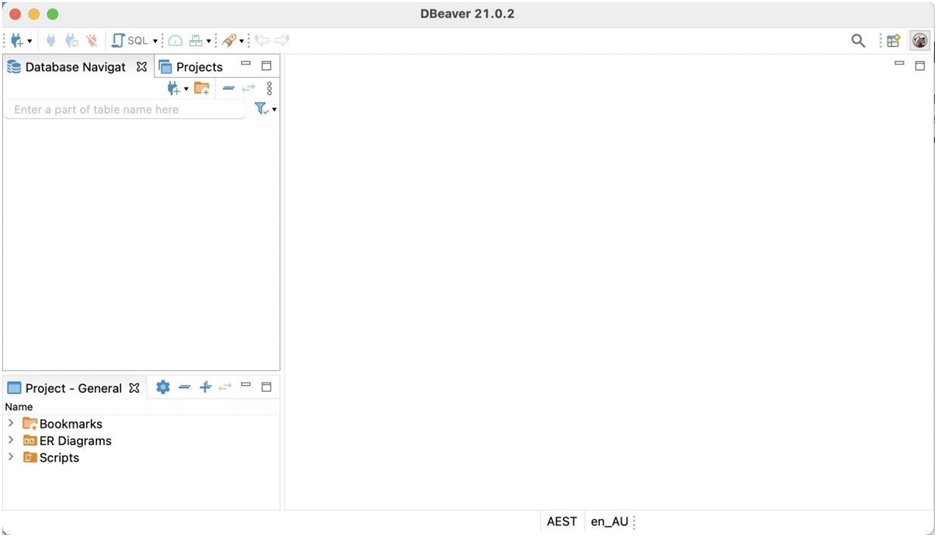
The above is the MAC version, but the Windows version will look similar. This is how the opening screen looks without any displayed connections. We now need to connect to a Data base by creating a Database connection.
When PostgreSQL was installed it automatically created as ample data base called postgres.We will begin by connecting to that
Your tutor will lead you through a quick discussion on the Deaver Icon Toolbar

Initially to make a new connection, we need to click the first icon on the toolbar, this will ten display the following
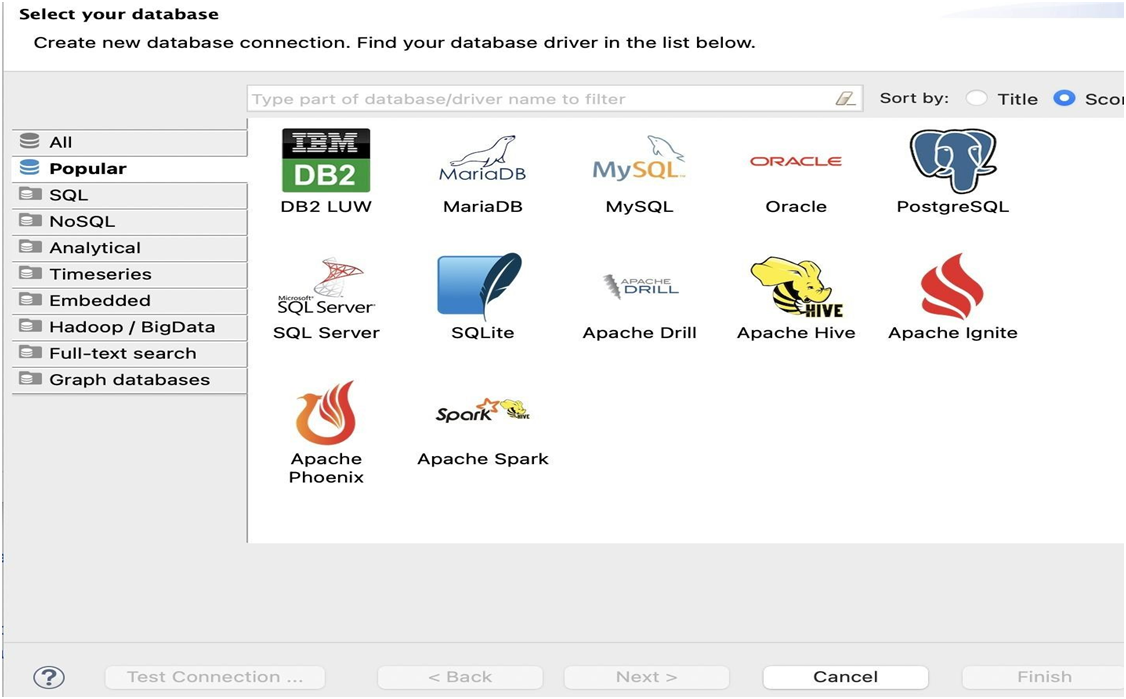
Click the PostgreSQL icon, then choose the 'next' button below when it becomes available.
The very first time this is done,you will need to download appropriate Java JDBC driver, you will see the following pop-up box (you don't need to do this for subsequent PostgreSQL connections)
 |
Just let it default and click the 'download 'button. The driver with then automatically download and install, then you will see the connection screen that needs to be filled out every time a new Connection is made.
 |
The name of the database we are connecting to is the default database created by PostgreSQL, called 'Postgres',that is already filled out. You need to fill in the user name and password you used when installing PostgreSQL.The default user name is normally 'postgres' as shown above, but when it was installed in the labs it was changed to 'Student', so you need to change the to the following
Username: 'postgres'
Password: The password you provided during the installation of PostgreSQL
You need to use this username and password combination for all database connections on the lab computers. Once you change the username and password, before you click 'Finish', click 'Test Connection' to make sure all is OK first. Then click 'Finish'. The connection will now have been created and will be available, even after you close the computer down and start it up again. See below
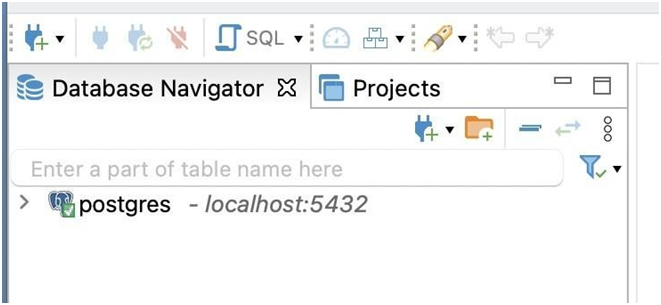
You should now be connected to the 'postgres' database.YouTutor will lead you through how to disconnect and re-connect to databases through DBeaver.
Additionally, your tutor will lead you through the process of Creating a new Database through DBeaver.
Task 1
Create a new Database called 'North wind', then create a new DBeaver connection to enable a connection to the North wind database.
Your Tutor will now discuss how we are going to create the tables and populate the North wind using two download able files from the HI5033 Database black board Shell. These are located in the 'Tutorial Materials' section, by clicking the Tutorial Materials link on the left of the Blackboard class shell. In the Item 'Tutorial 3 Sheet and Files', you will see two downloadable files
northwind_ddl.sql.txt (the DDL statements to create the tables) northwind_data.sql.txt(theDDL/DMLstatements to add records)
Download these two files and briefly examine the min Windows using a text viewer, these are just text files containing SQL statements. We will discuss SQL in detail beginning next week.
Your tutor will show you how to load and execute these files in DBeaver
Task 2
Create the Northwind Database tables.
Load in all the sample data into the North wind database tables
Task 3
Explore the tables and structure of the North wind database Examine the sample data which was input via the SQL scripts Explore the inbuilt ER diagram facility of DBeaver.
Your Tutor will lead you through the process of backing up the Database to a USB drive
Task 4
Using the DBeaver Data View of the Customers Table ,add a new customer to the database. Use your own Student ID as the Customer_id and use your own as the company name. Save any changes.
Task 5
Make a backup of your version of the database onto a USB drive. Don't forget to bring your USB Drive to the class next week.

Get original papers written according to your instructions and save time for what matters most.